How to Plan Your Renovation Schedule So Your Project Flows Smoothly
Renovating your home can feel overwhelming. Whether you are working on only a sinlge room or an entire property the principle and sequence is the same. There are many moving parts, trades to coordinate and surprises that can slow things down. A clear, realistic renovation schedule isn’t just nice to have — it’s essential to keep your project on time, on budget, and under control.
Below you will find a practical guide provided by UIL to help you in planning your order of works, with insight drawn from real renovation experience and adapted into a format you can use if you’re about to embark on works in your property.
1. Start with the Big Picture — Think Sequence, Not Just Tasks
When setting out your renovation or refurbishment timeline, it’s important to understand that not all jobs are equal — and some depend on others being completed first. For example:
Structural repairs and essential maintenance that prevent further damage must be prioritised.
Weathertightness comes before internal finishes — you don’t want newly fitted floors or decorations ruined by water ingress later.
Before you make any schedule, list all the tasks you anticipate and map out dependencies (what must be done before what). This high-level view gives you a foundation to build a practical timeline and communicate expectations with your contractor. Gantt chart software will help.
2. Typical Order of Works on a Renovation
Although every project is different, works generally flow along a sequence that protects the building and prevents rework:
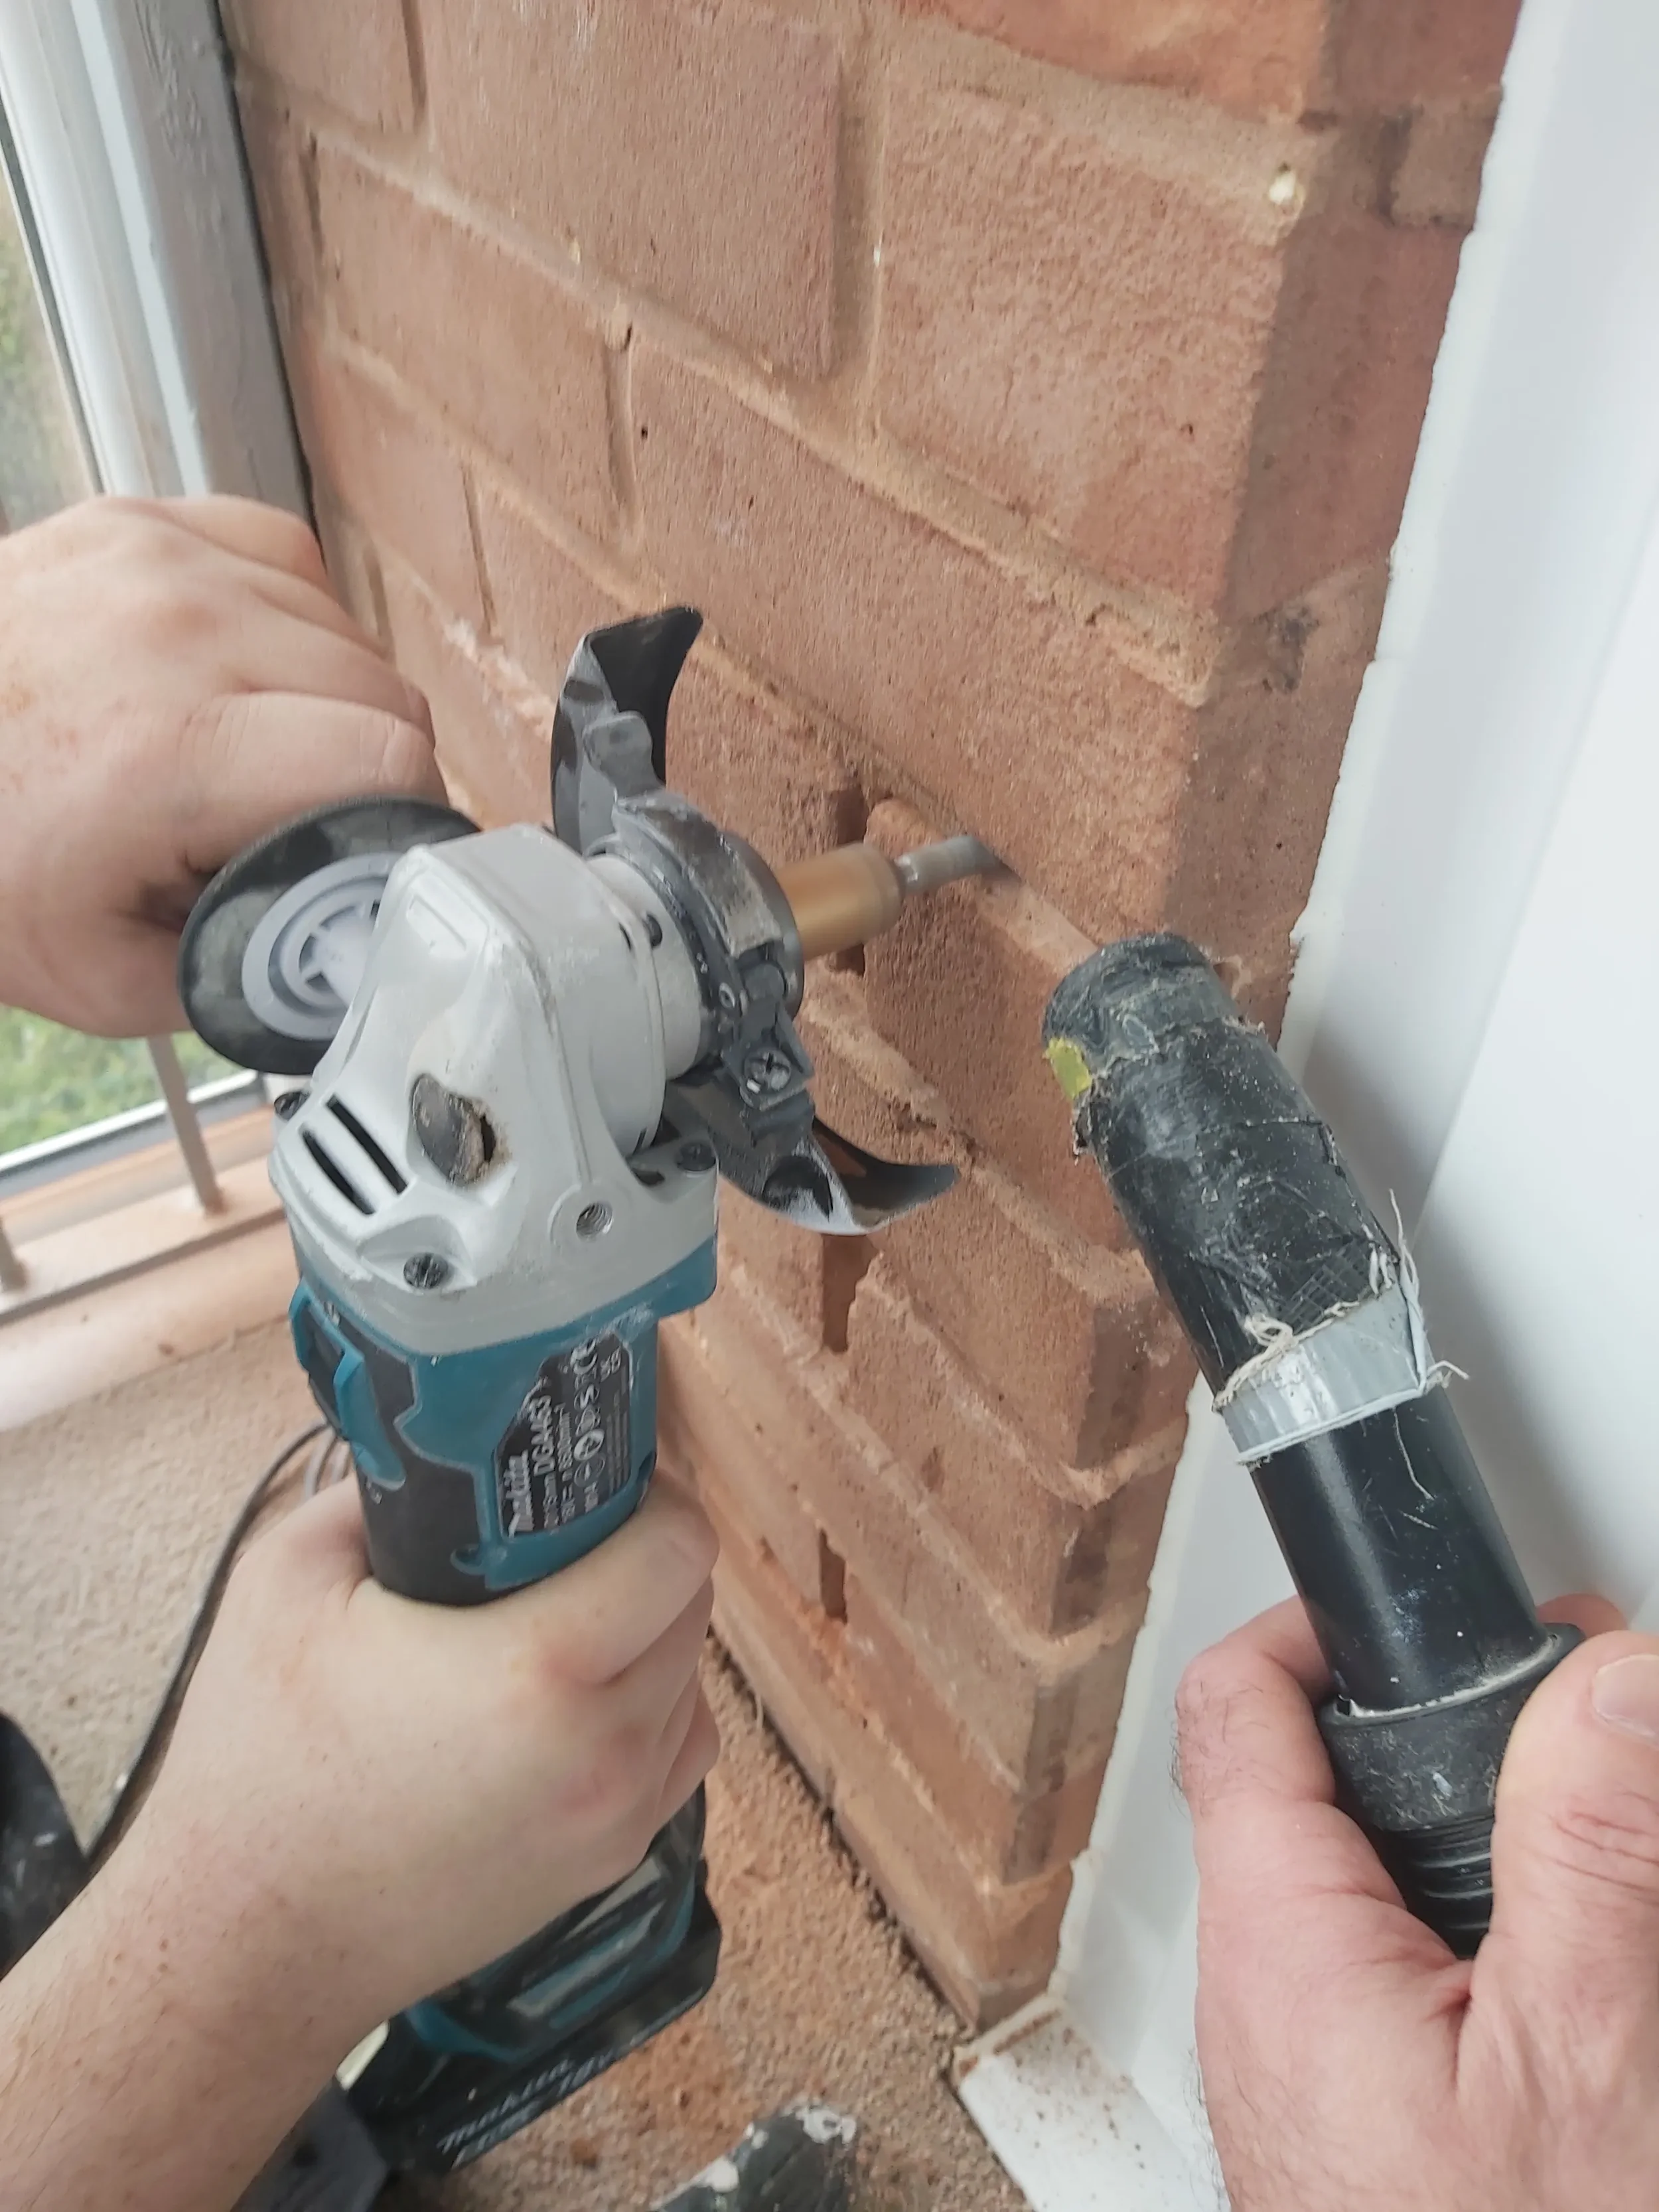
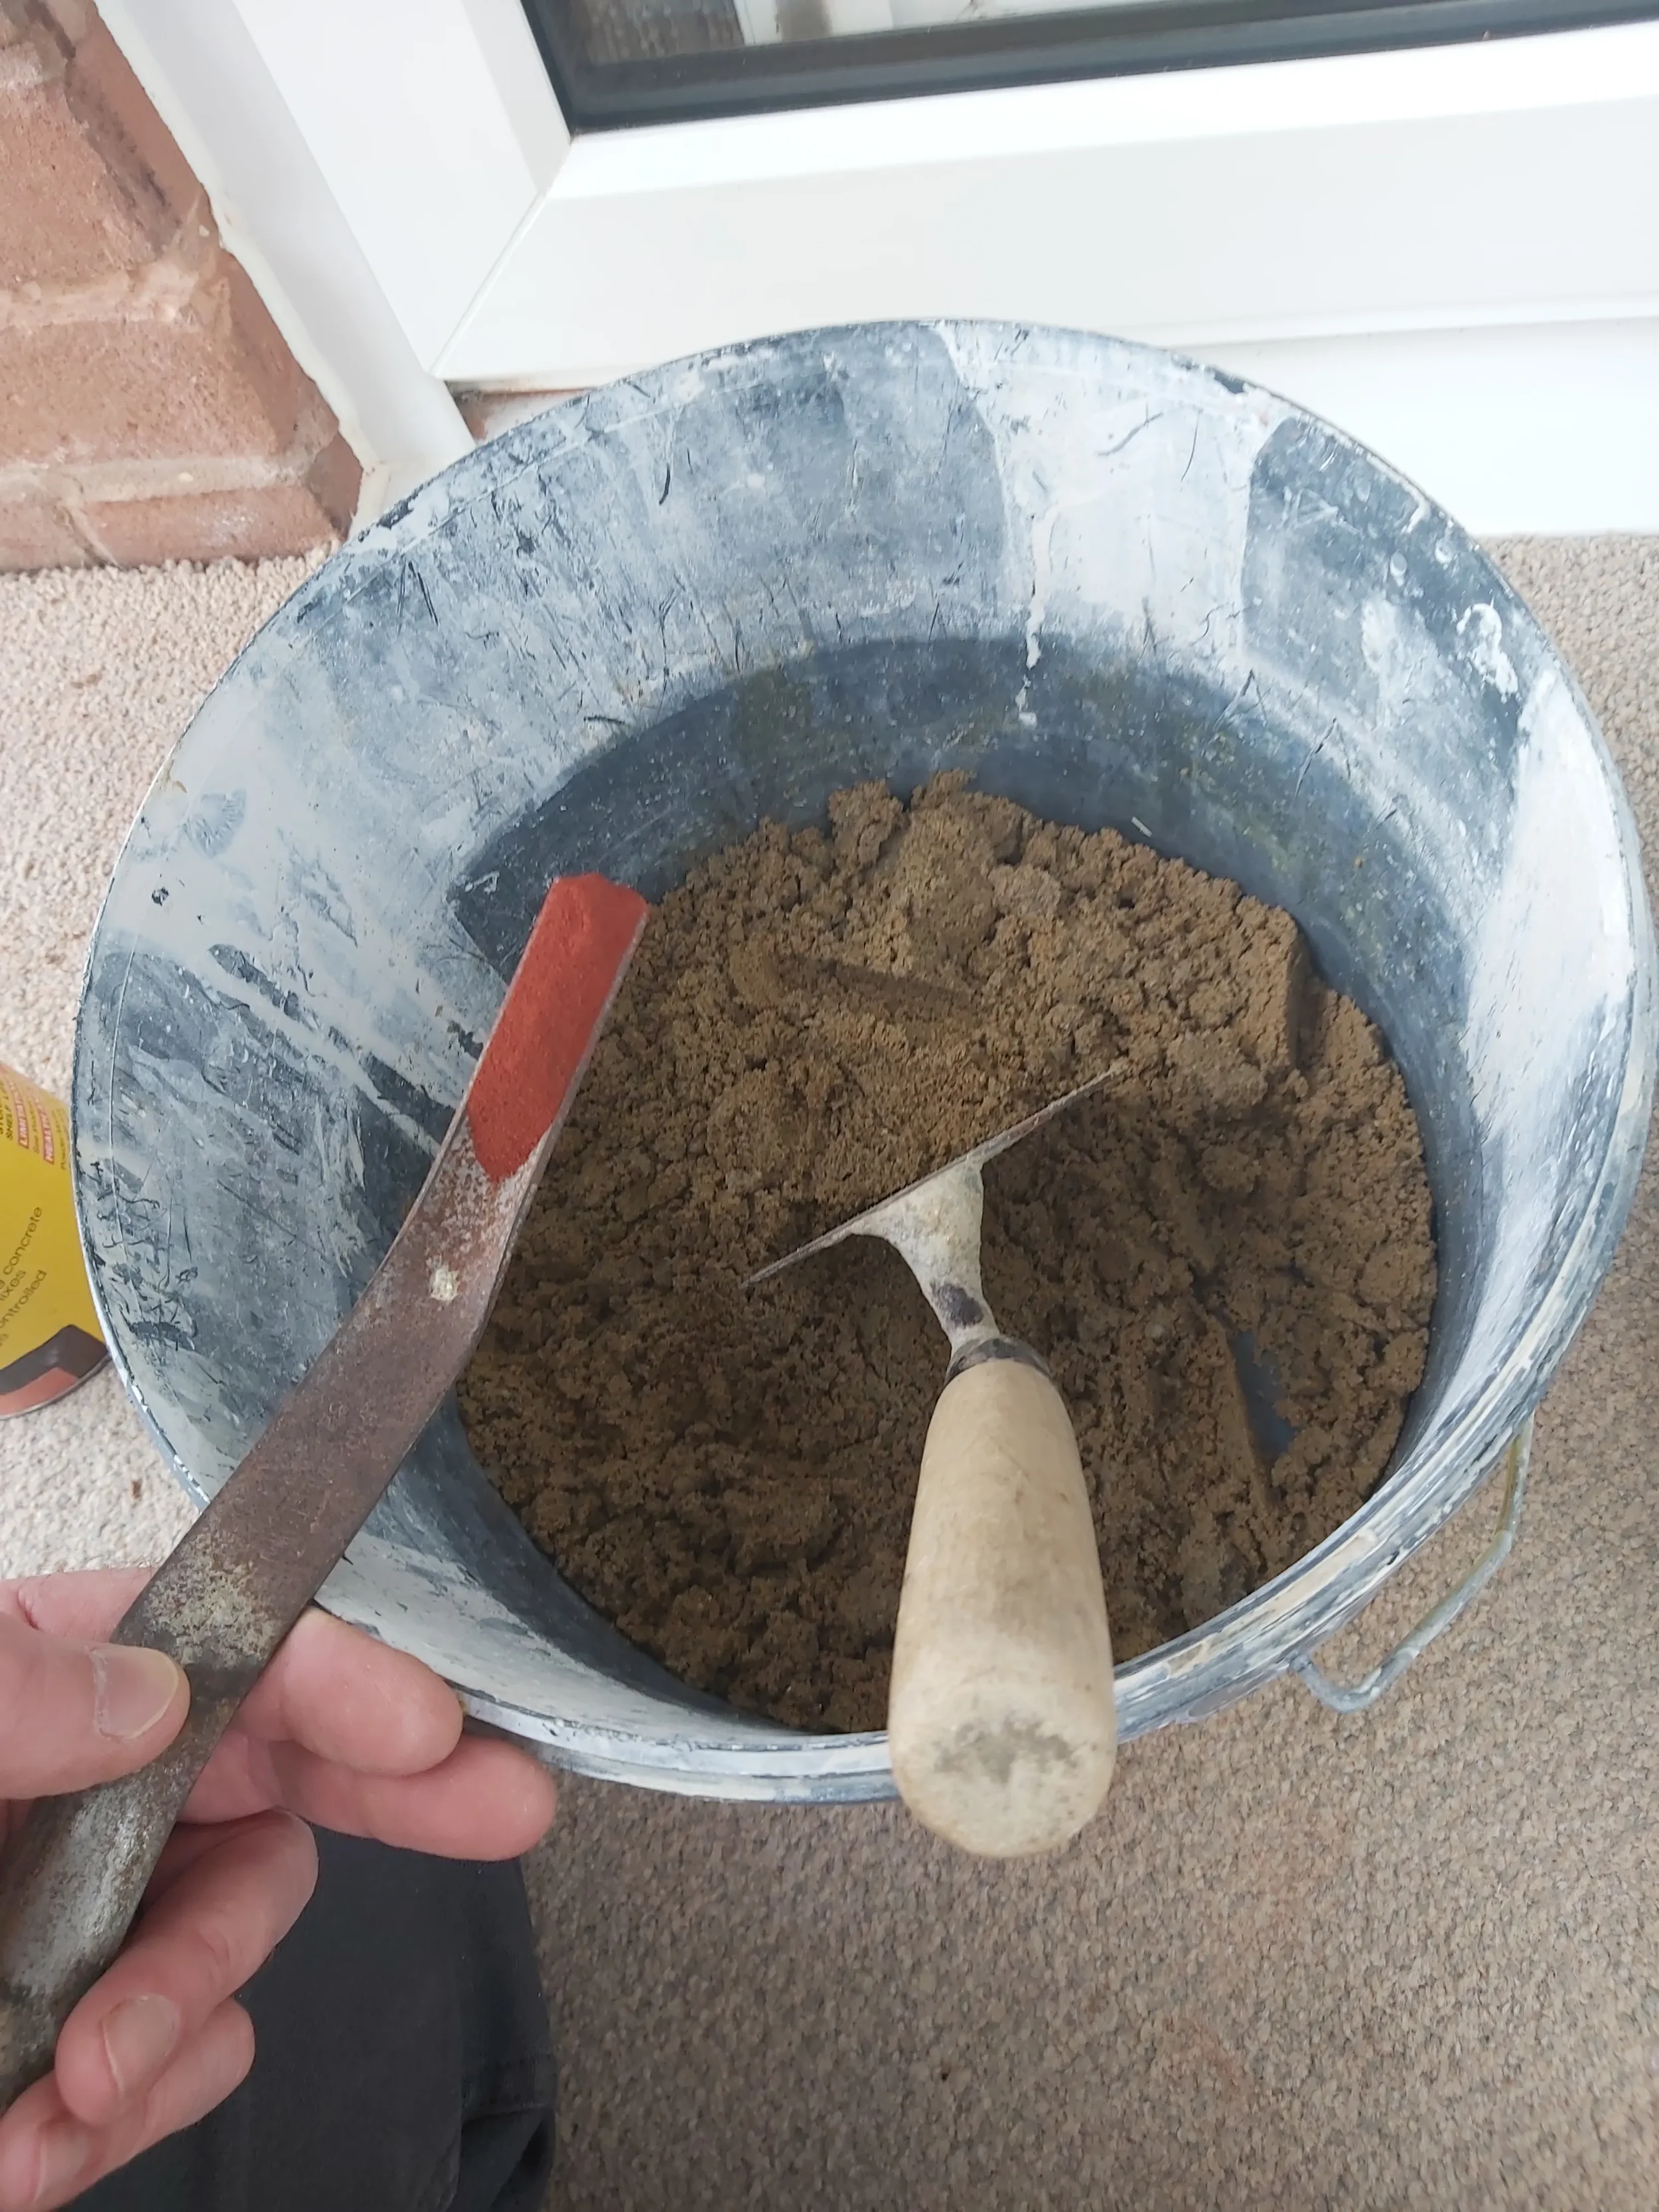
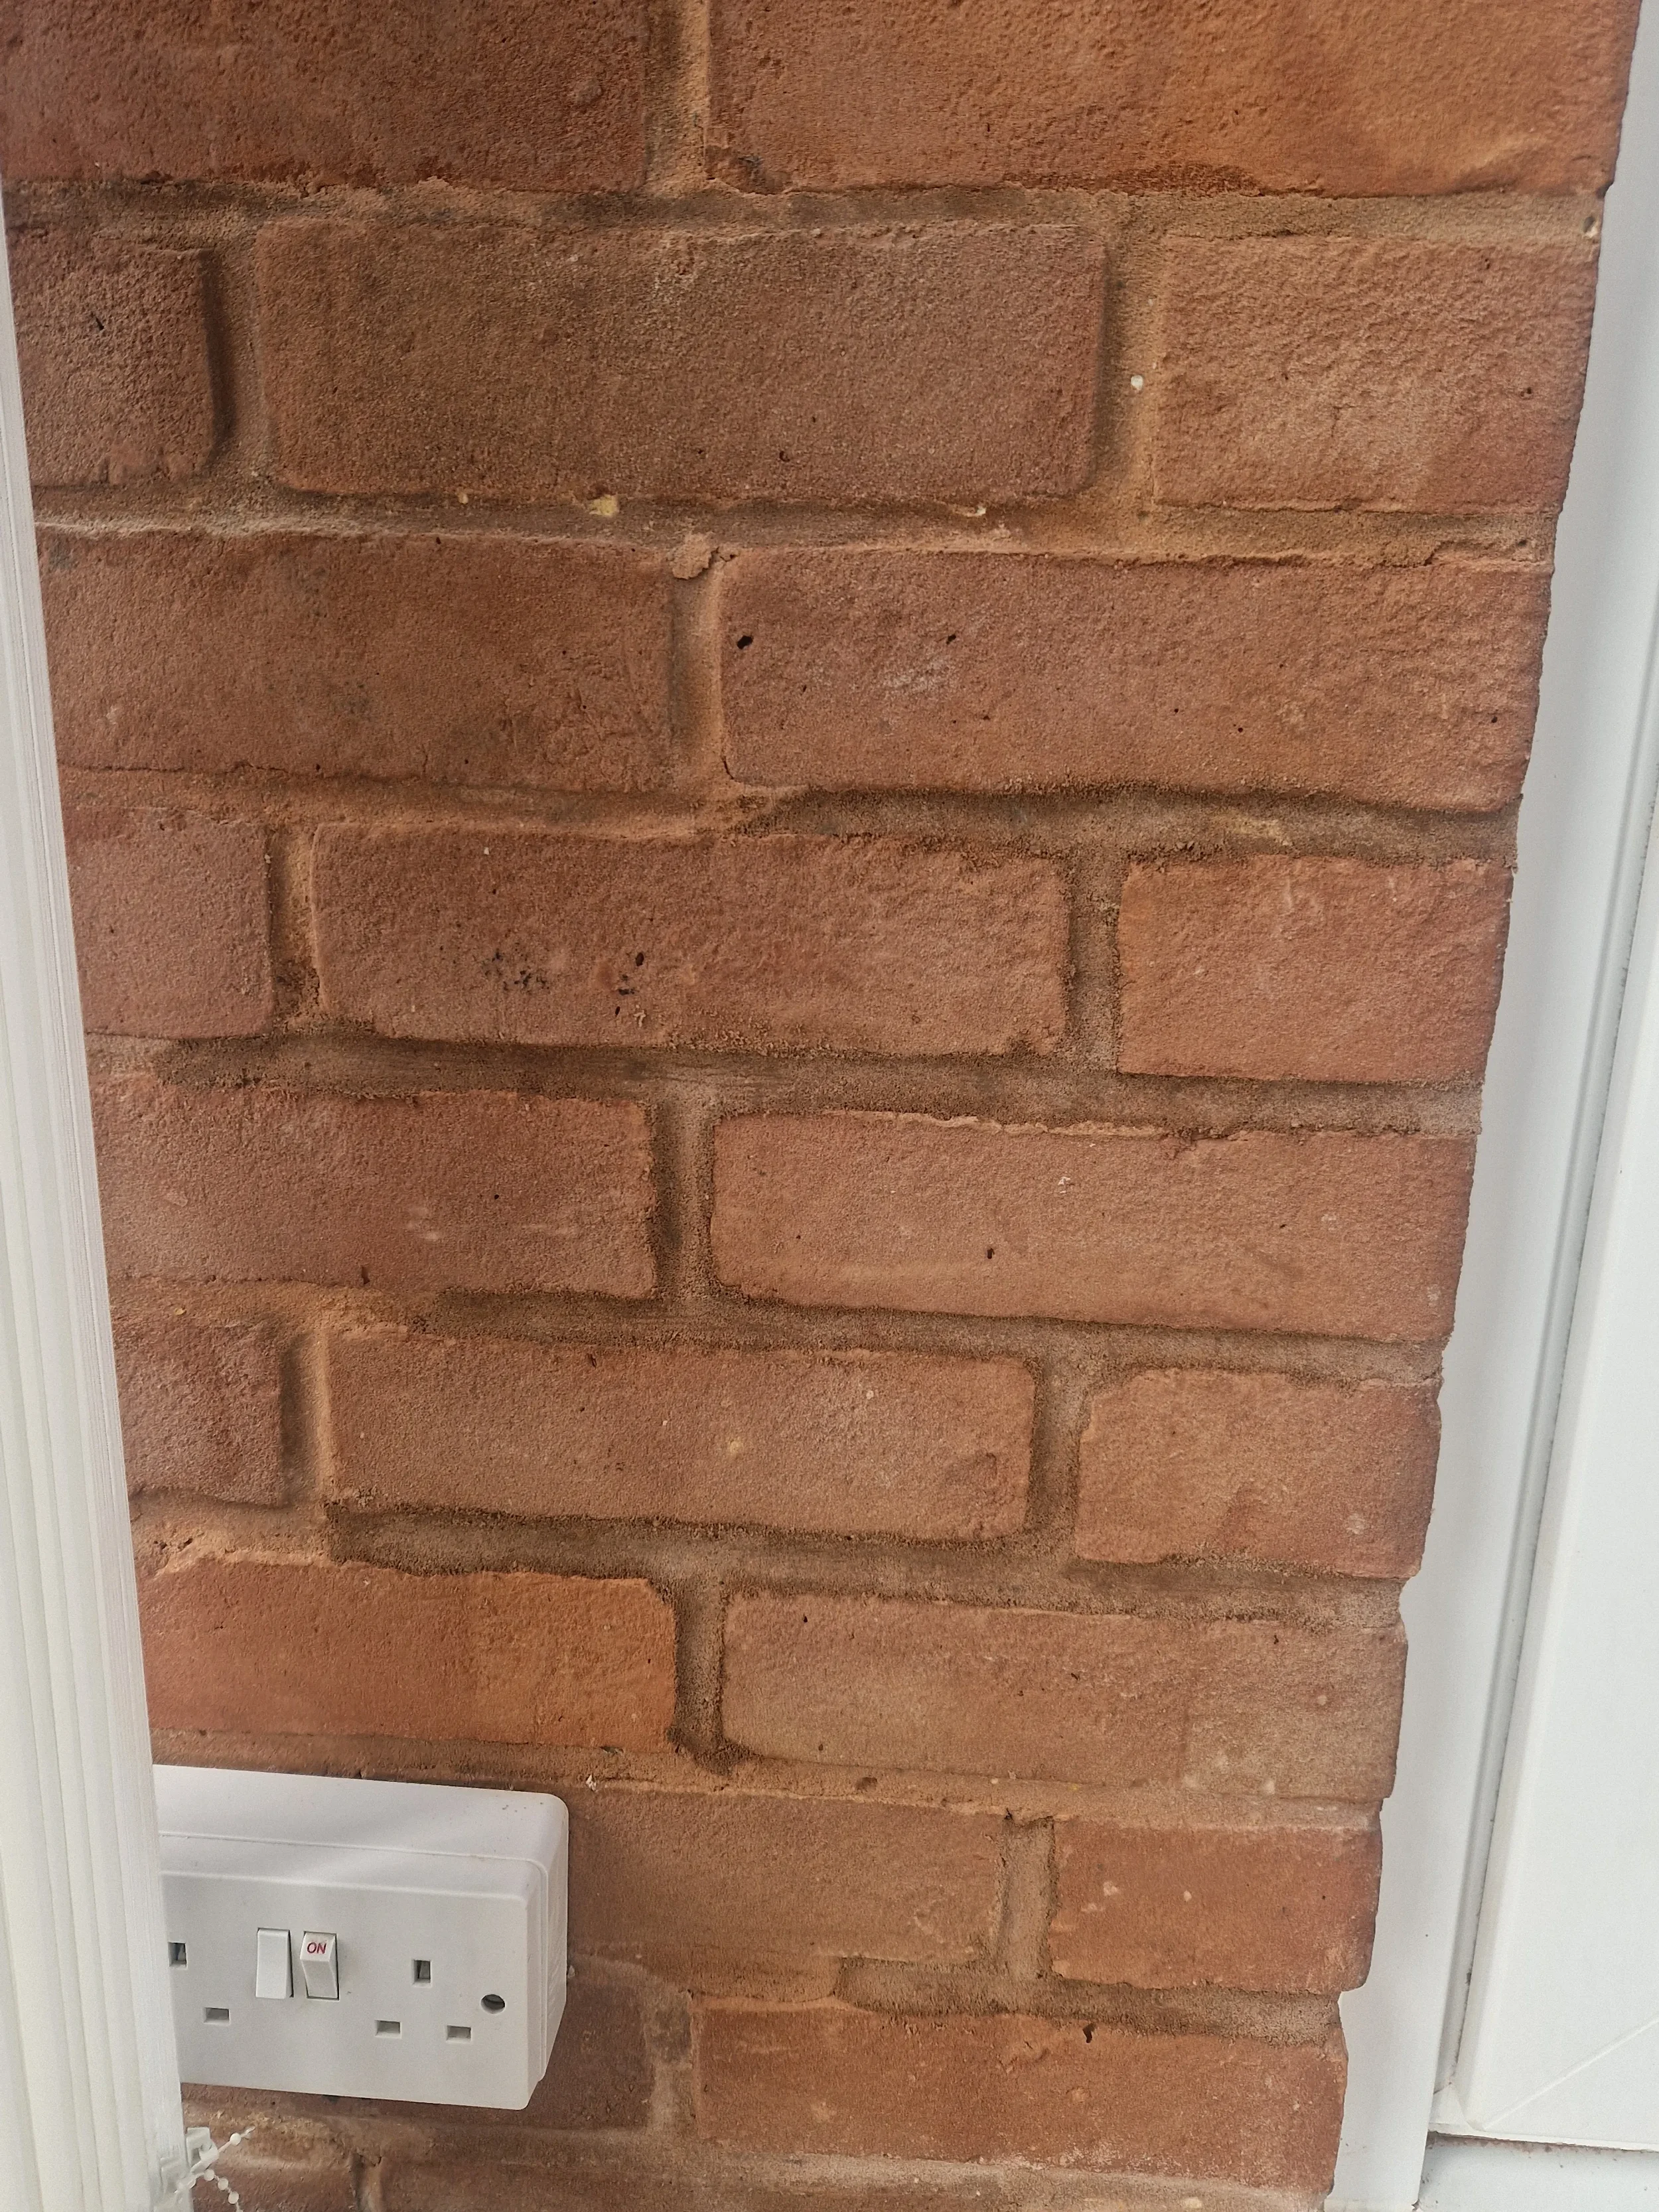
Demolition & Structural Fixes
This includes removal of unwanted elements and making sure everything is solid and safe. If you’ve got an eroded section of wall, for example, you’d resolve that early — including matching the mortar colour and repointing where needed — before moving on to other tasks. Addressing these issues at the start stops them escalating later on.

External Envelope & Weatherproofing
Roofing, windows and doors are completed here so the building becomes dry and secure. When windows are reinstalled or replaced, things like drip details to the underside of a stone window sill should be checked - we recently found a new extension with no drip detail! This allows the water to track back along the cill and soak into the wall causing damp and water ingress. So we hand-cut a new drip detail into the underside of the cill. This helps ensure that rainwater is thrown off the wall face, protecting masonry and limiting long-term moisture issues.

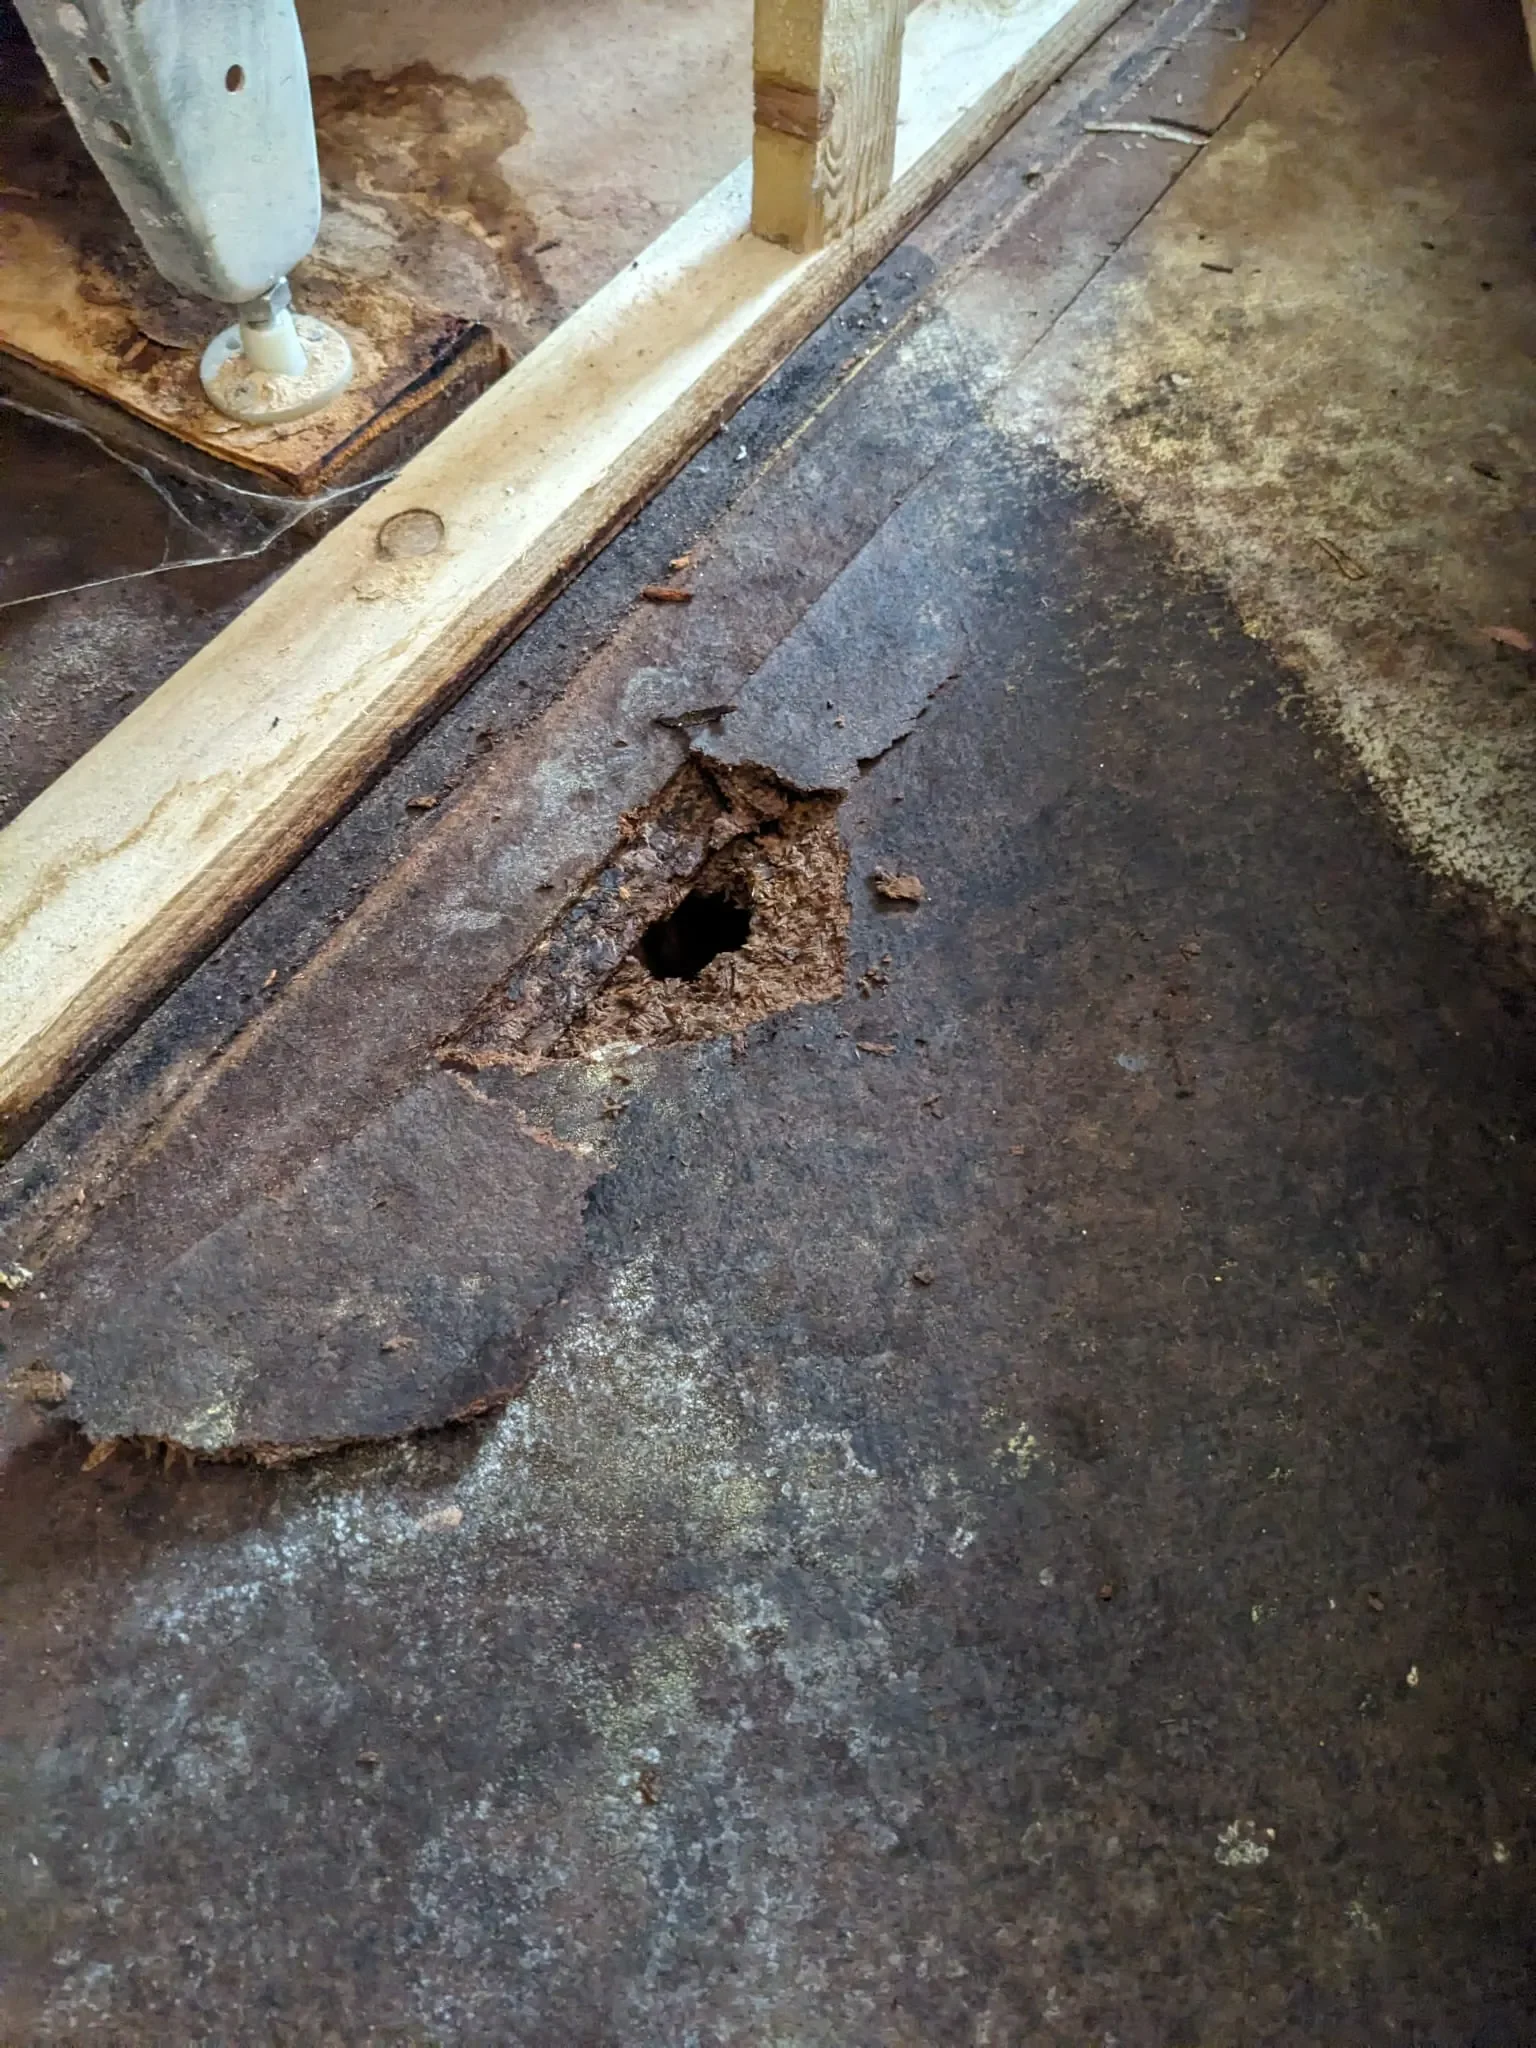
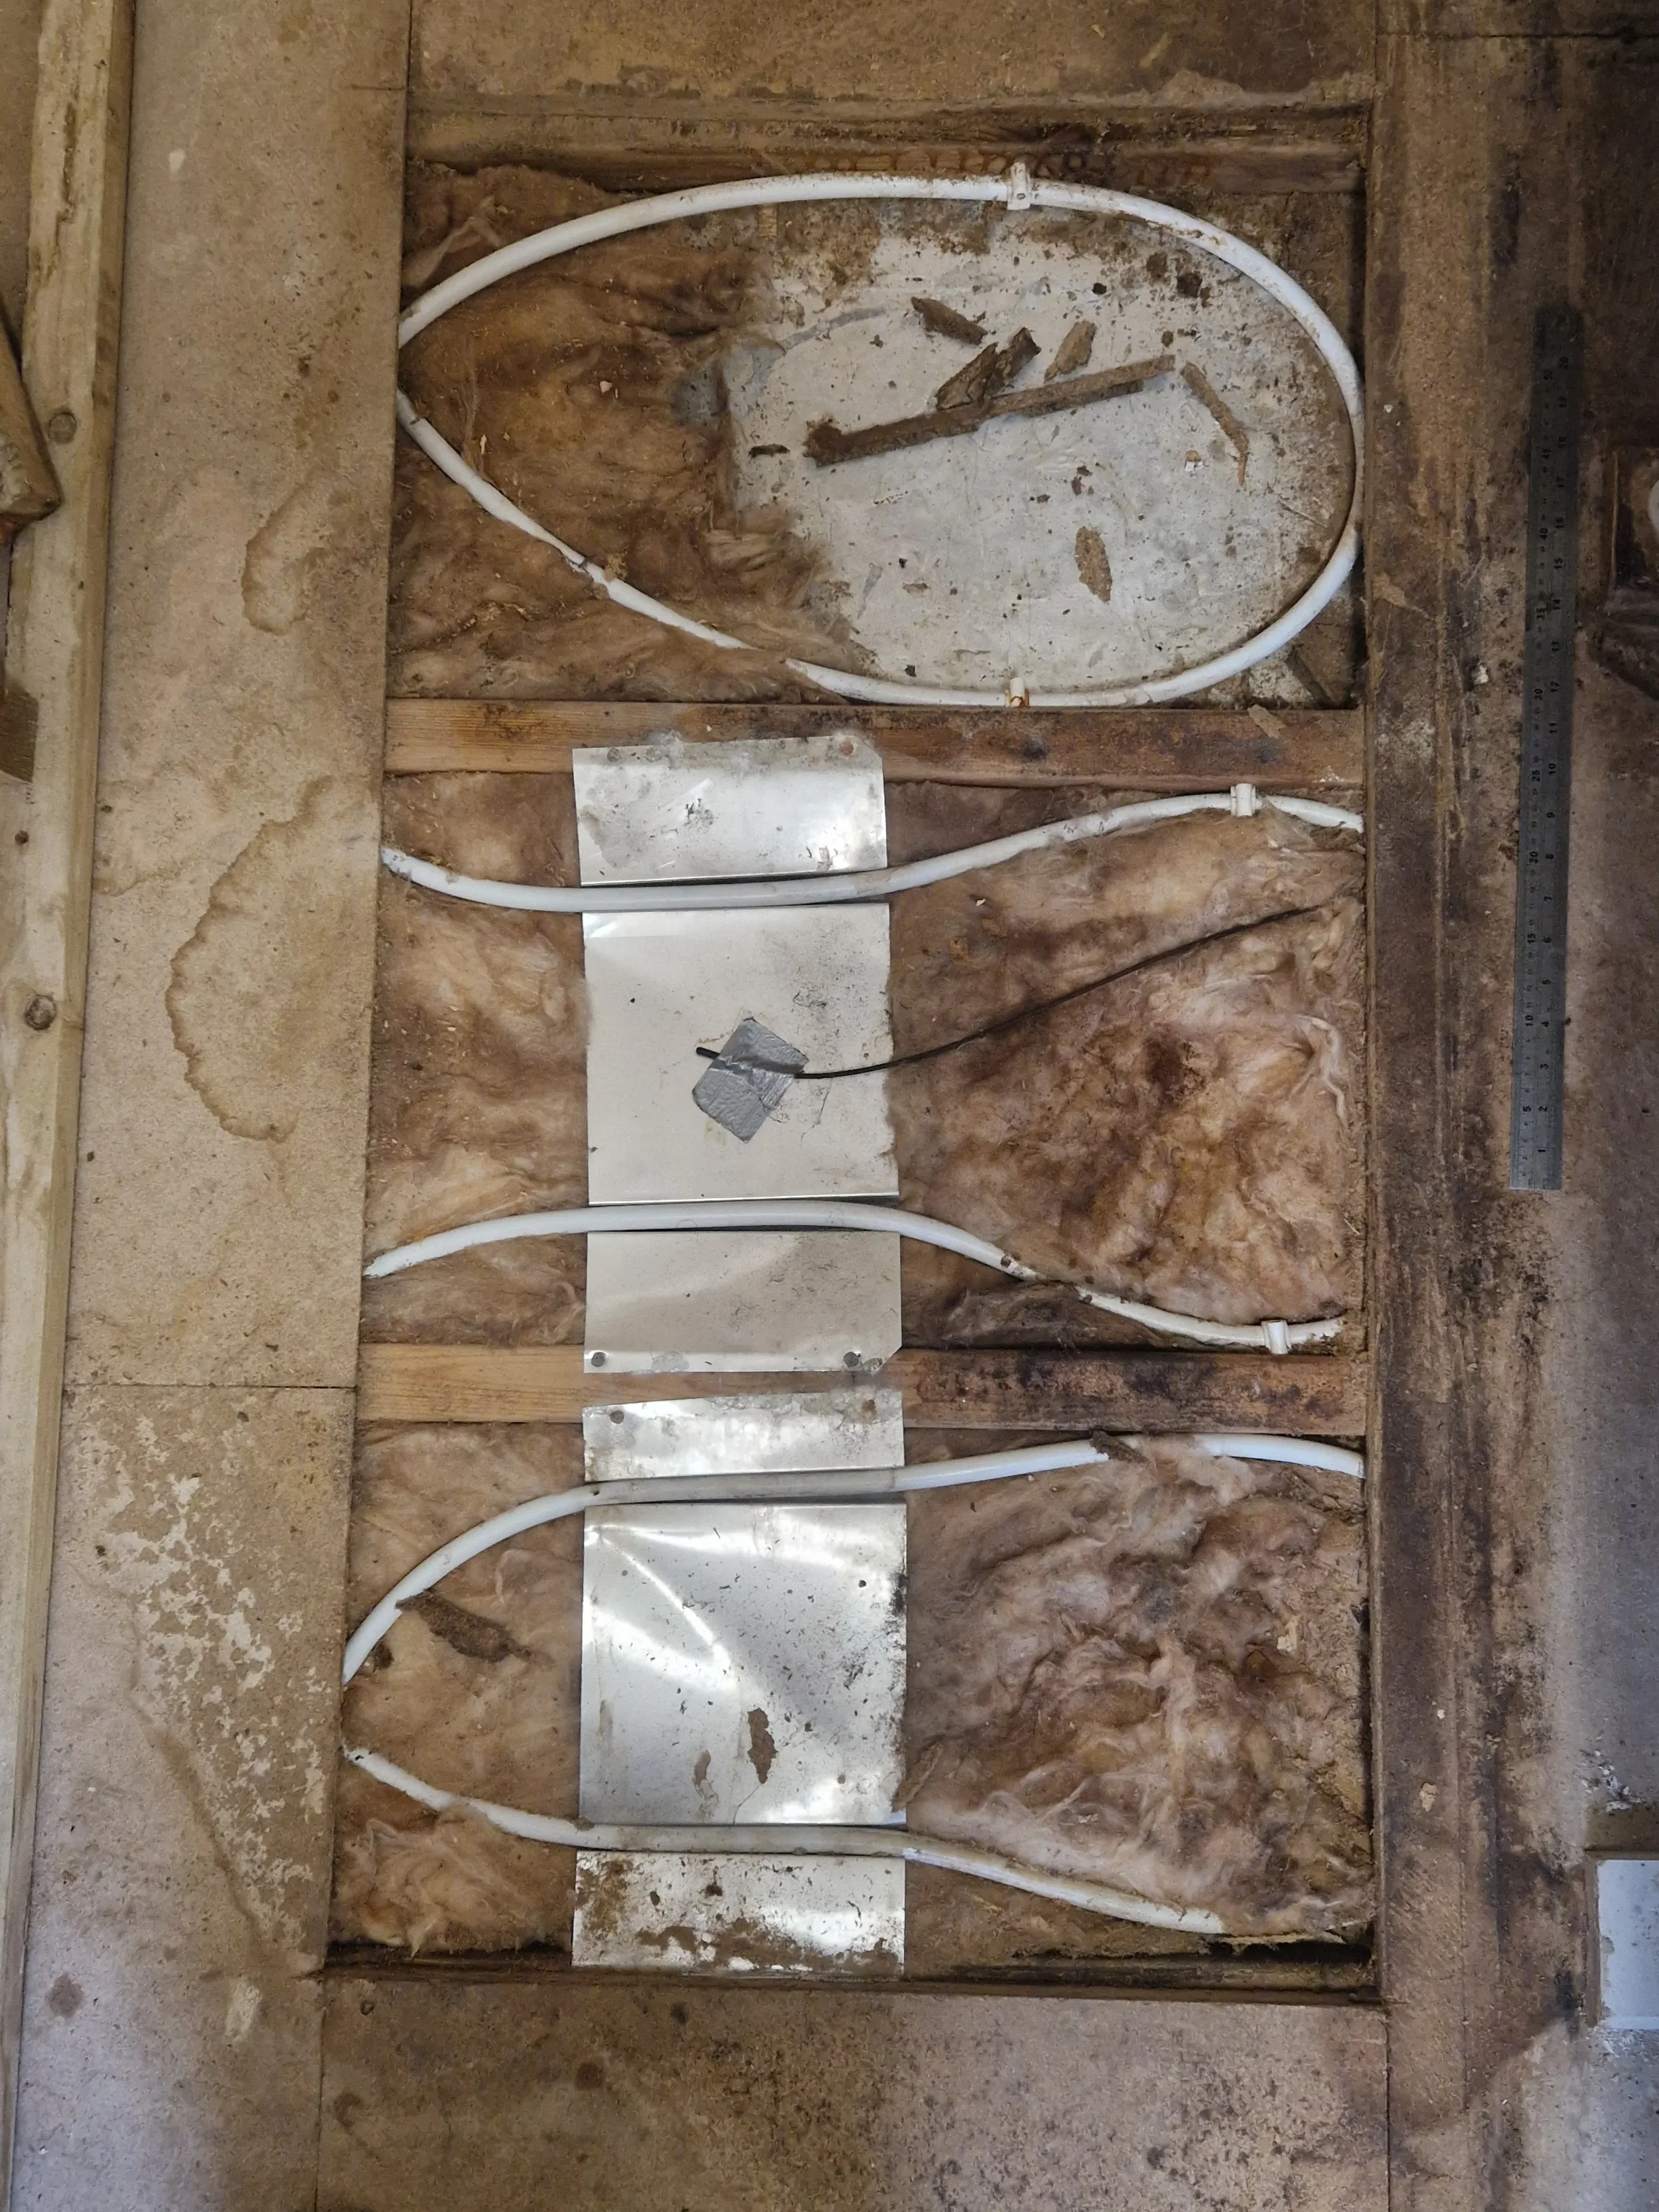
First Fix: Behind-the-Scenes Work
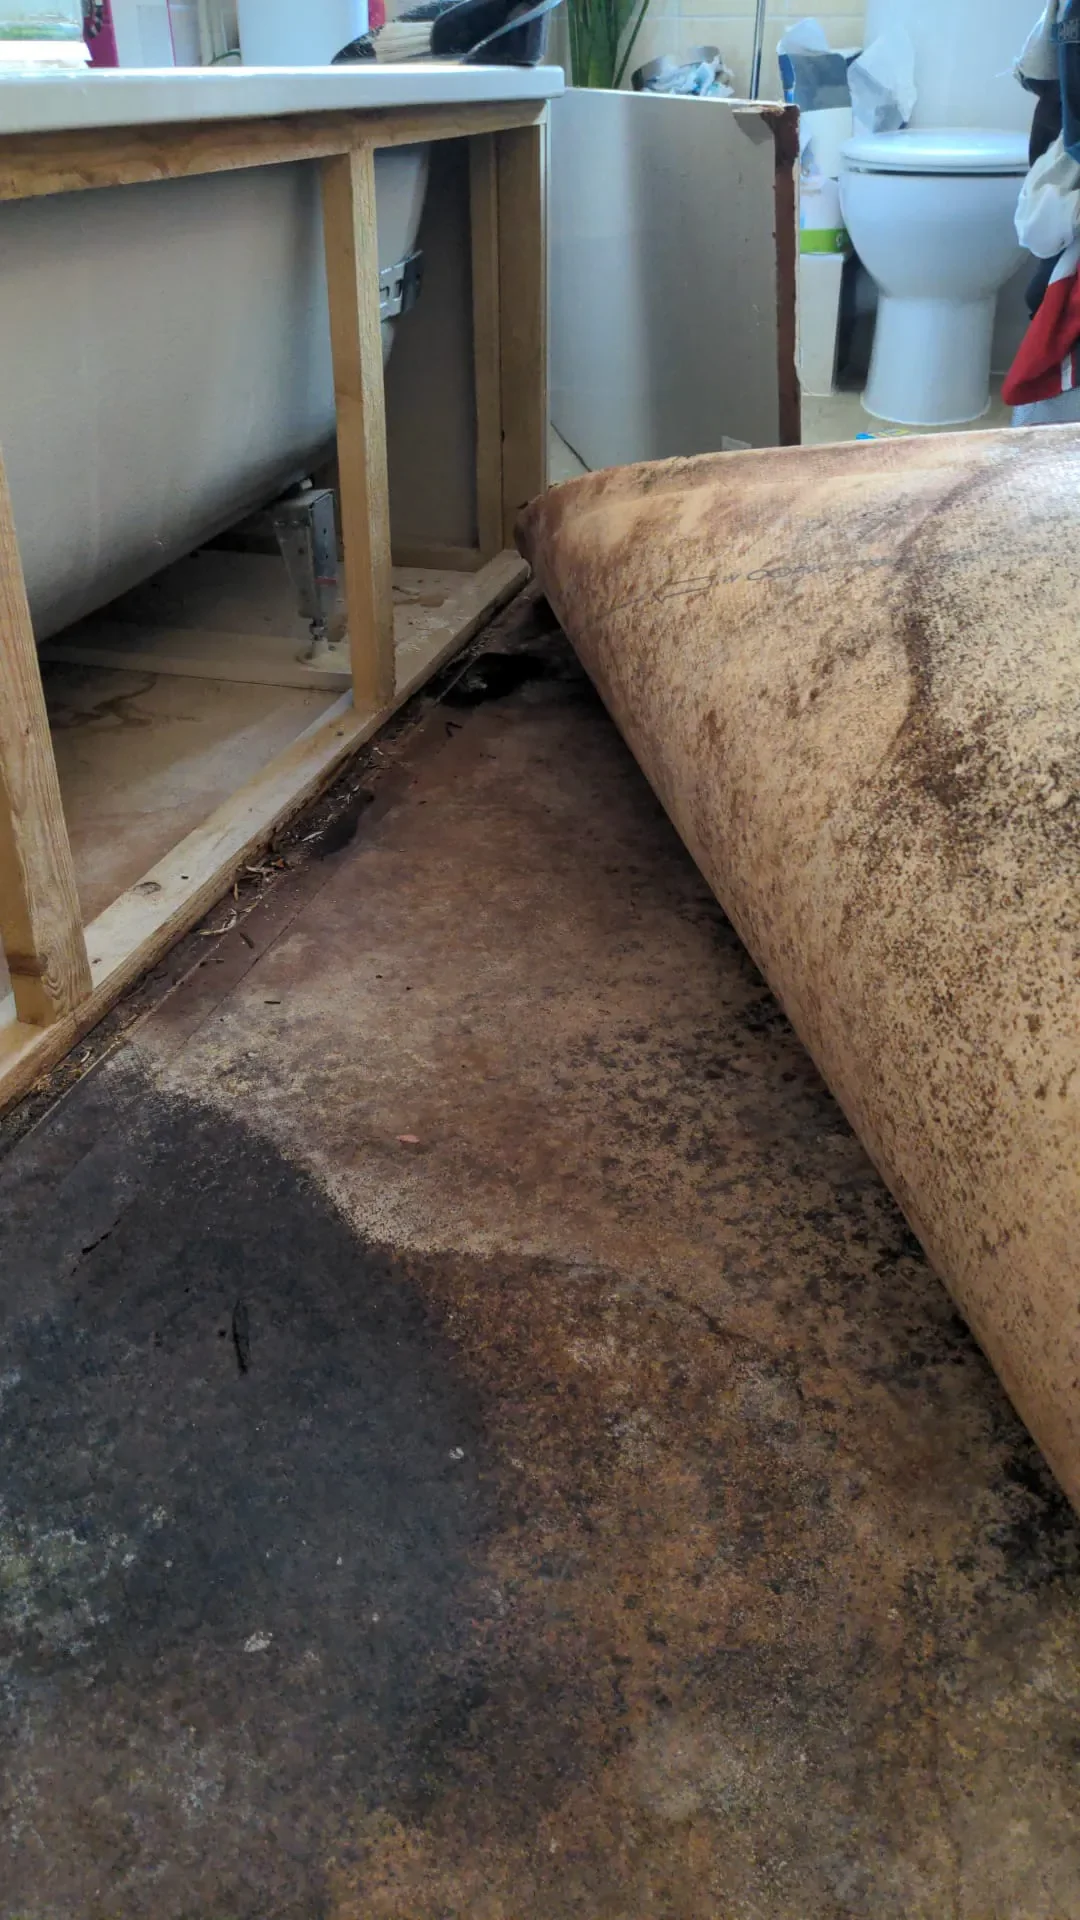
Now the internal skeleton of services and structures goes in — stud walls, electrical, plumbing, and insulation. At this stage, if you’ve experienced floorboard damage from a leaking bath, this is when those timber boards get carefully repaired or replaced and refinished so the floor looks seamless and performs well long term.
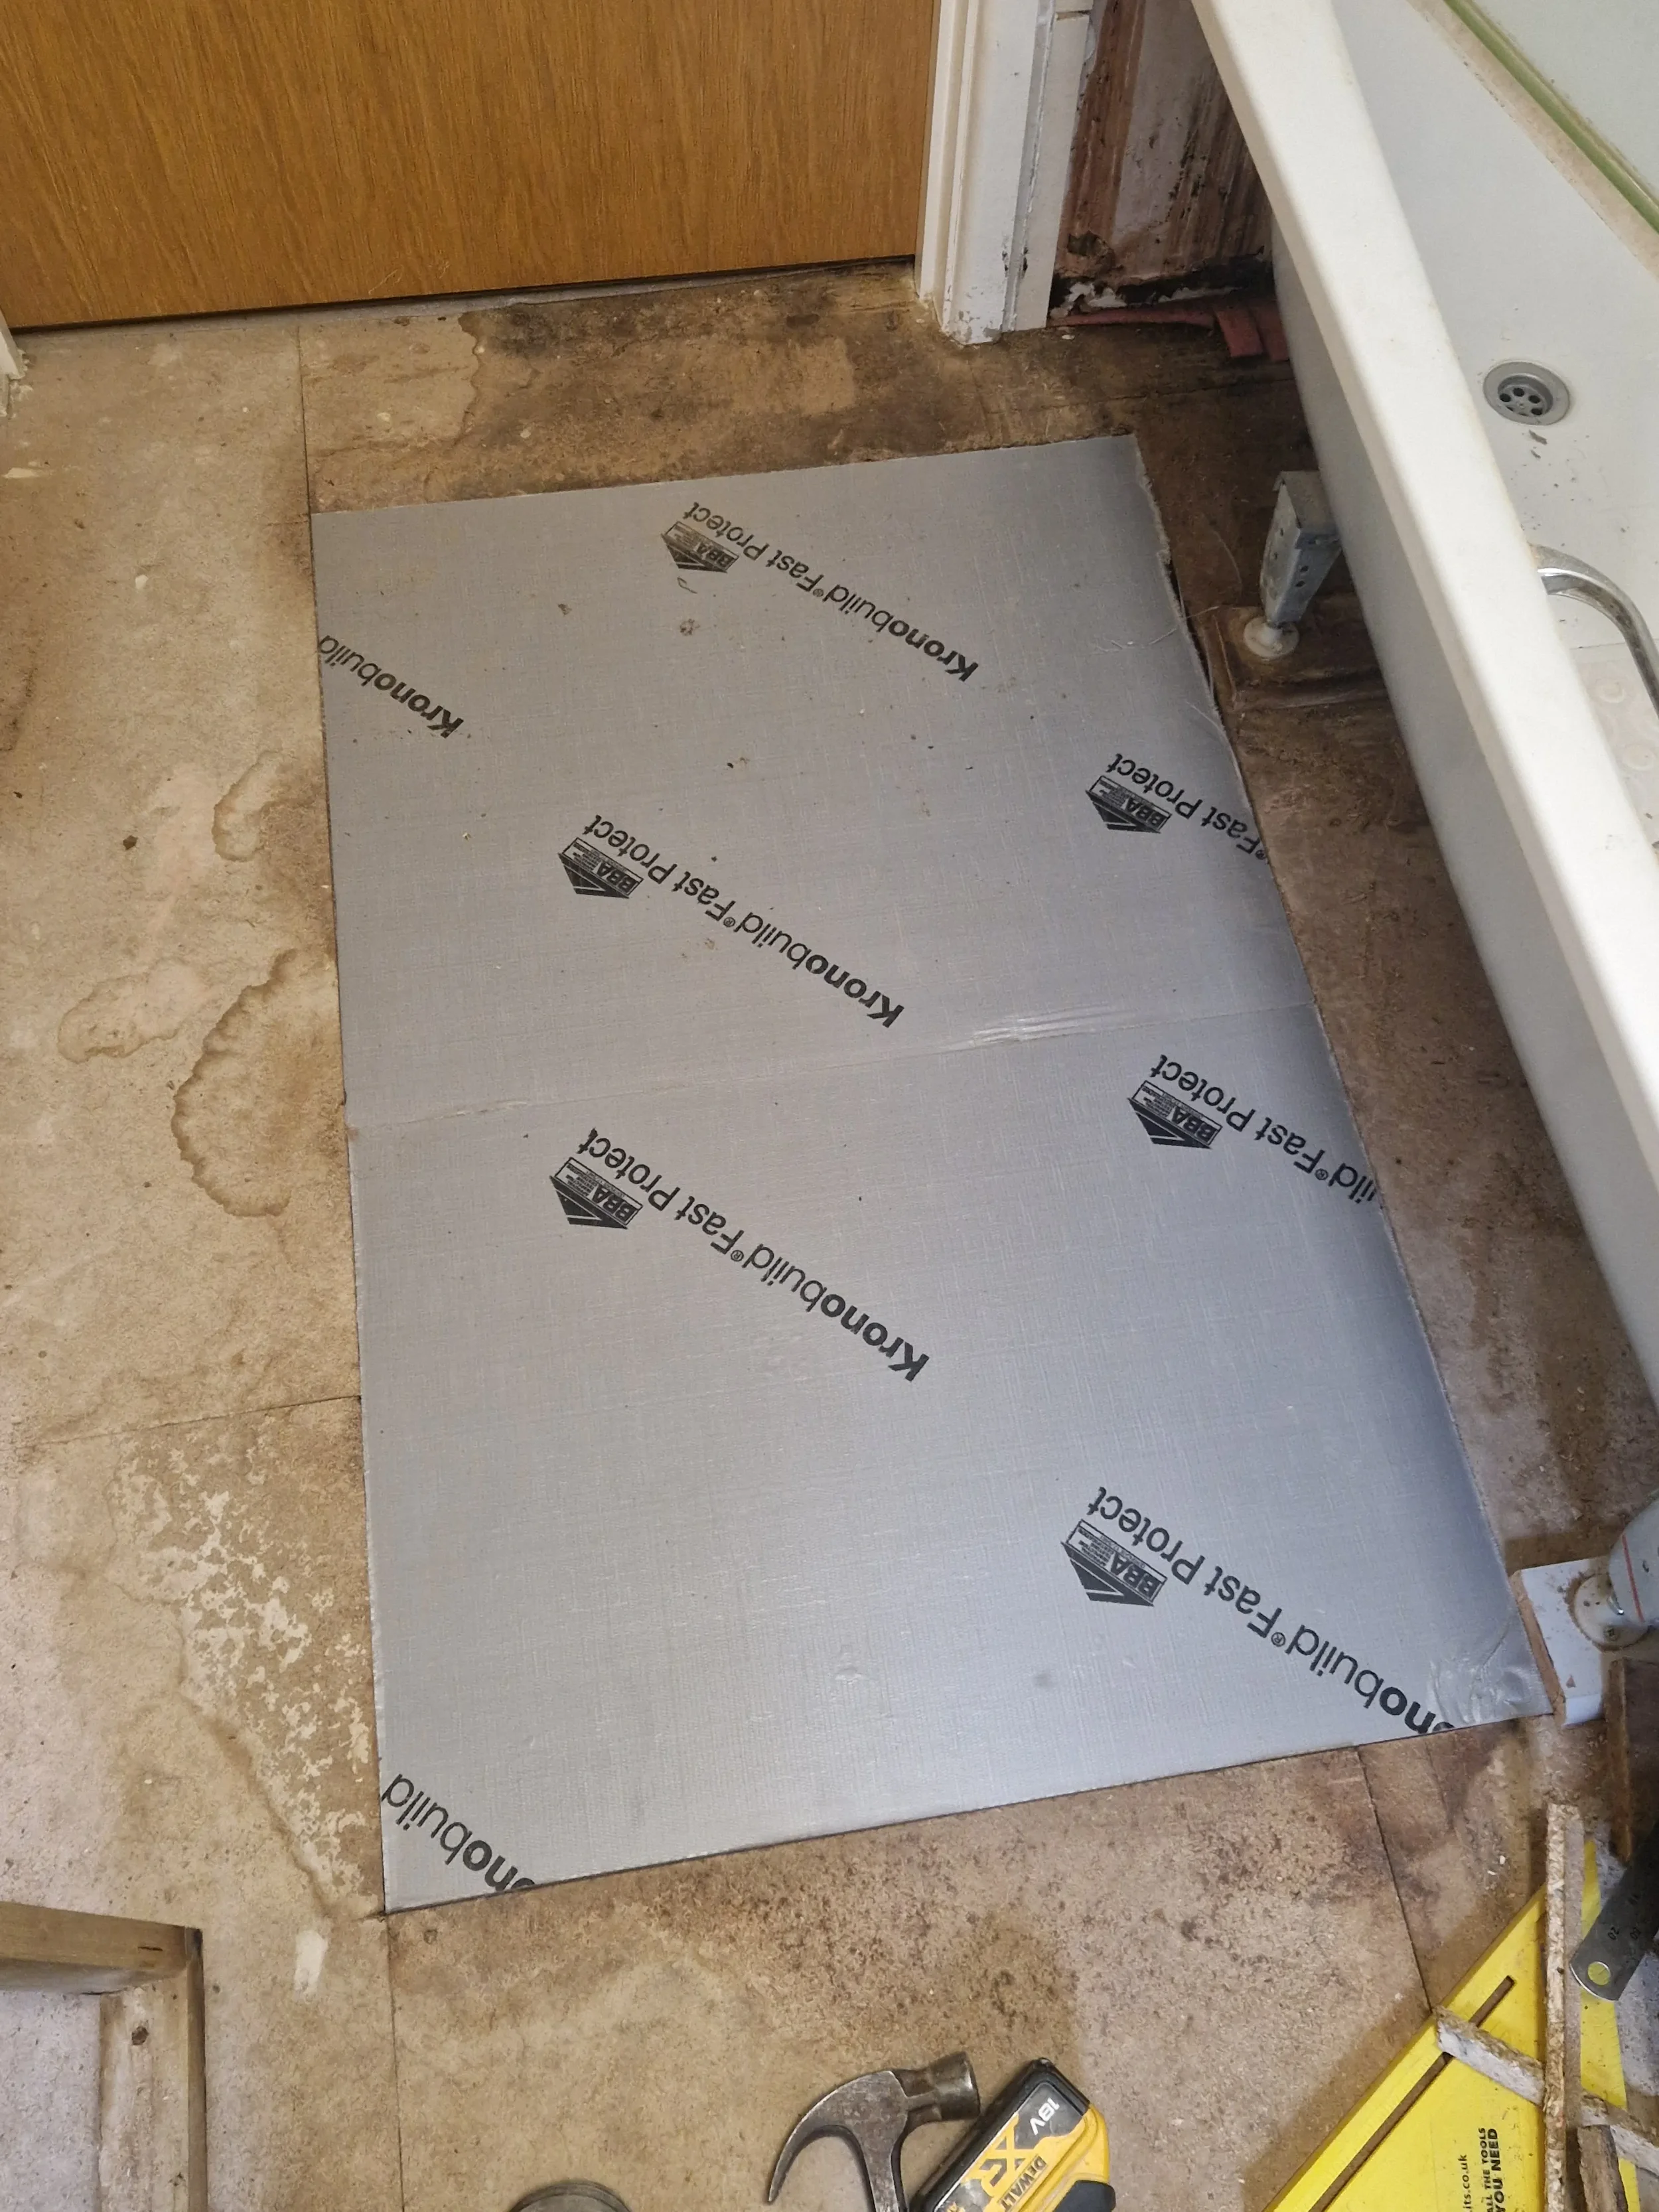

Plastering & Surface Preparation
Walls and ceilings can be sealed and made ready for final finishes once services are hidden inside.
Second Fix and Finishes
This is where the interior starts to take shape — fixtures, fittings, floors, kitchens and bathrooms.
Decorating & Final Touches
Painting, skirtings, carpets, and detailed carpentry happen last so they aren’t damaged during earlier, messier tasks.
Snagging & Handover Checks
Before calling the job finished, walk through with your contractor to ensure everything meets the agreed standard.
This staged approach avoids redoing work later, keeps subcontractors coordinated, and protects your investment in each element of the project.
3. How Long Does Each Stage Take? Plan Realistically
There’s no one-size-fits-all answer — durations depend on project size, complexity, materials, team size and trades availability. A structural issue or hidden defect could add days or weeks; that’s normal. It’s much better to build a schedule with realistic timings agreed with your contractor than one based on hope.
A good rule of thumb:
Structural and external works might take several weeks or months.
First and second fix works can be ongoing for months on larger projects.
Finishes and snagging typically take longer than expected because quality comes down to detail.
Consult with the specialists doing the work — experienced builders and tradespeople will give you informed durations, not guesswork. Remember - it will all be worth it in the end.
4. Communication Keeps Your Schedule Alive
Even the best schedule is a living document. Delays happen — bad weather, disrupted deliveries, unexpected defects — and these will ripple through your original timeline. Open communication is the key to minimise impact.
Regular check-ins, clarity on dependencies between trades, and quick decisions from you help maintain momentum. It’s far better to adjust expectations early than let delays compound unnoticed. UIL have written another blog on communication here.

5. Your Renovation, Better Managed
Planning your renovation schedule isn’t about rigid deadlines — it’s about control. By understanding the logical sequence of works, building in realistic durations, and staying in sync with your contractor, you keep quality high and stress low.
Whether fixing masonry, repairing floors after water damage, or improving window detailing to protect your walls, a structured schedule helps you prioritise what matters — and get it done right. If you’d like help turning your own renovation ideas into a workable programme of works with costings and timings, we’d be glad to support you.